
How To Soundproof a Wooden Floor? {4 Proven Ways}
Wooden floors allow a lot of noise to pass through. Any impact noise, even some airborne noises from downstairs can make their way to your space.
Not only this but sound from its surface tends to bounce off and this works like fuel in the fire. It makes even the smallest noises seem louder than they really are.
I’ve been down that road myself, and let me tell you, the struggle was real until I made it soundproof.
So, what did I do? How did I make my hardwood floor less of a noise party?
Well, I’m going to spill the beans in this post and share some more techniques to make your wooden floor soundproof. Let’s get into it!
4 Proven ways to soundproof a wooden floor
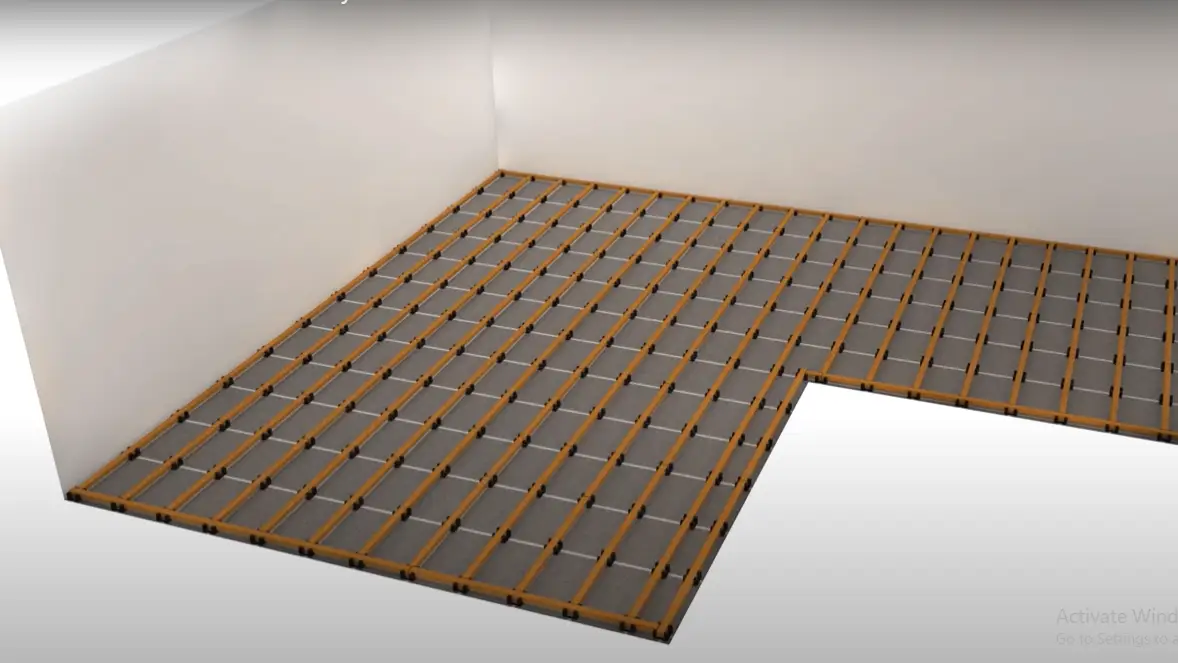
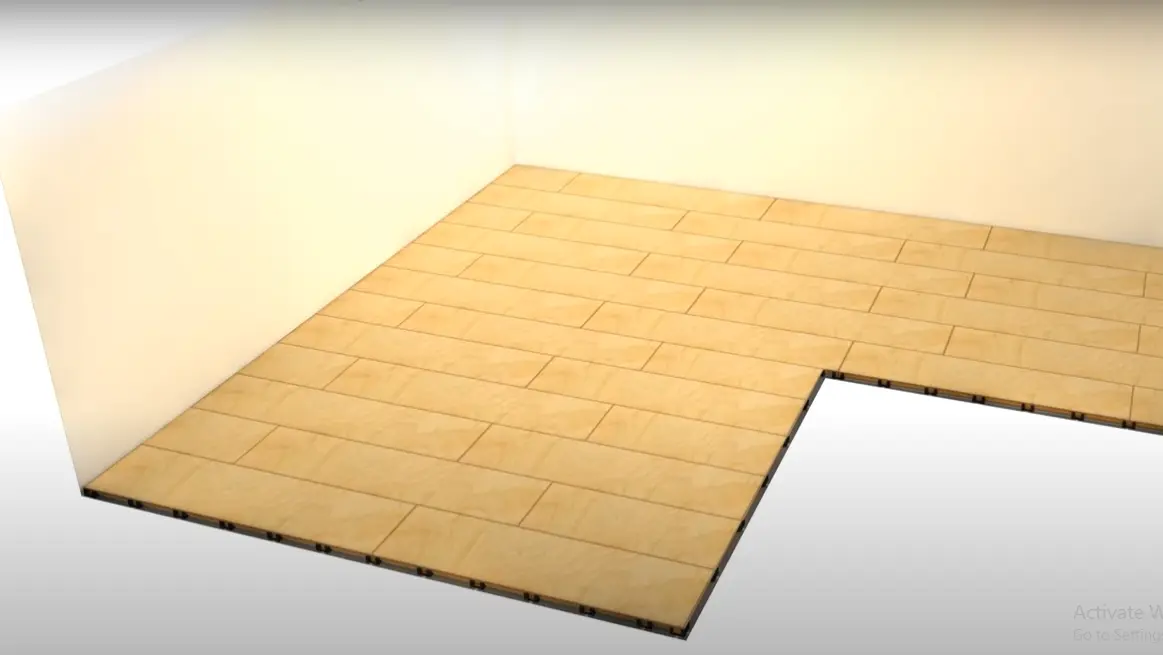
1: Install floating floor
So if you want a more permanent and long term solution for your wooden floor from noise then installing a floating floor is an option you may want to consider.
Whether you are dealing with noise from downstairs or any other noise source it can silent that. A floating floor is a flooring installation method where individual planks or tiles are not directly glued or nailed to the subfloor.
Instead, they are attached to each other, creating a “floating” layer over the subfloor. It prevents impact noise traveling through the floor.
However, it can be super expensive. According to modernize.com, the cost of installing a floating can be $2 to $11 per square foot.
And if you’re hiring help, add another $4 to $8 per square foot. So it is better if you do it yourself. Here’s a simplified guide to get you started:
Materials You Need:
- Cradle for the floor
- Batten
- Green glue
- Floorboard
- Screws and a screwdriver
Step-by-Step Guide:
Step 1: Draw horizontal lines on the floor, 10 inches apart, and then do the same vertically using chalk.
Step 2: Now, place the cradles around the edges of your marks and at each intersection point.
Step 3: Insert those battens into the cradles. Start around the edges, then work your way to the center.
And if you want to go extra miles, then you can even fill the gaps with insulation for more soundproofing.
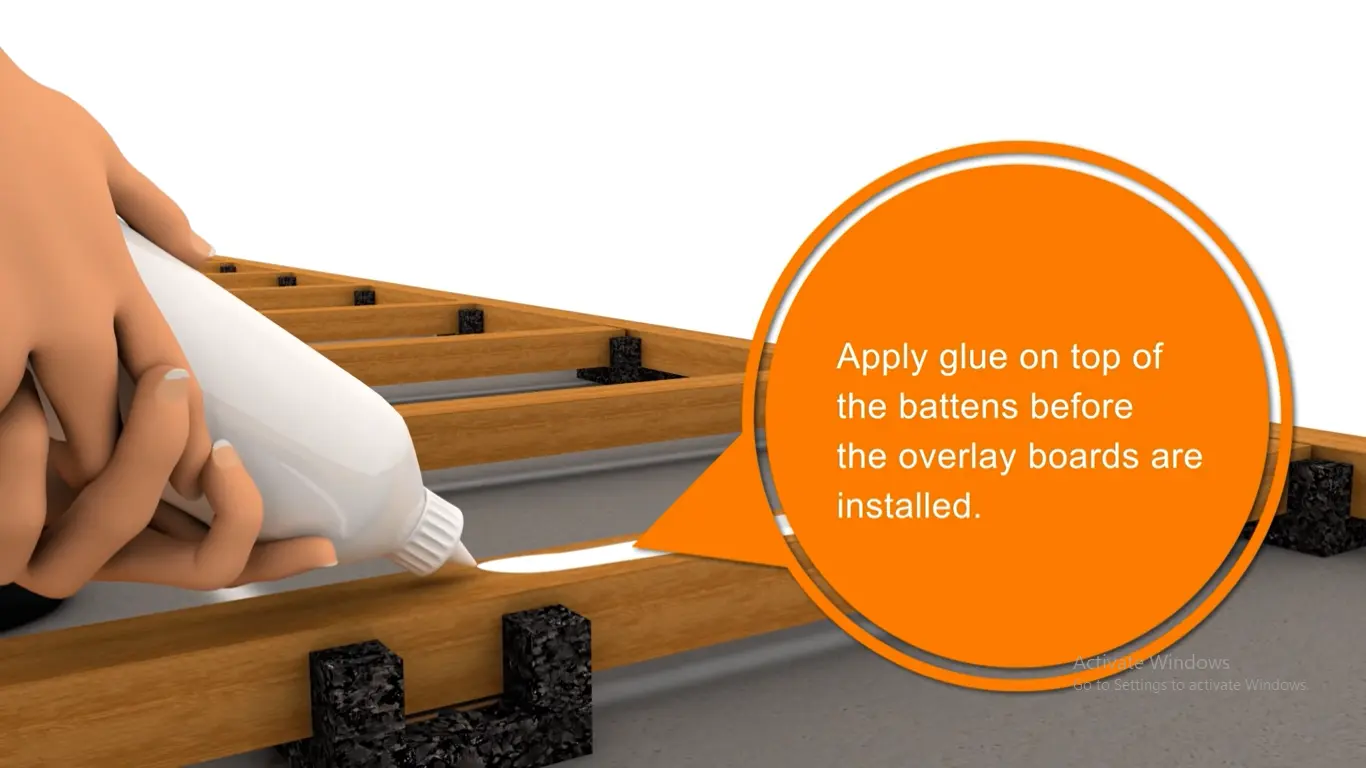
Step 4: Now, put glue on the top of the batten and attach the floorboard over it.
Step 5: For some extra security, screw the board to the batten using 2-inch screws.
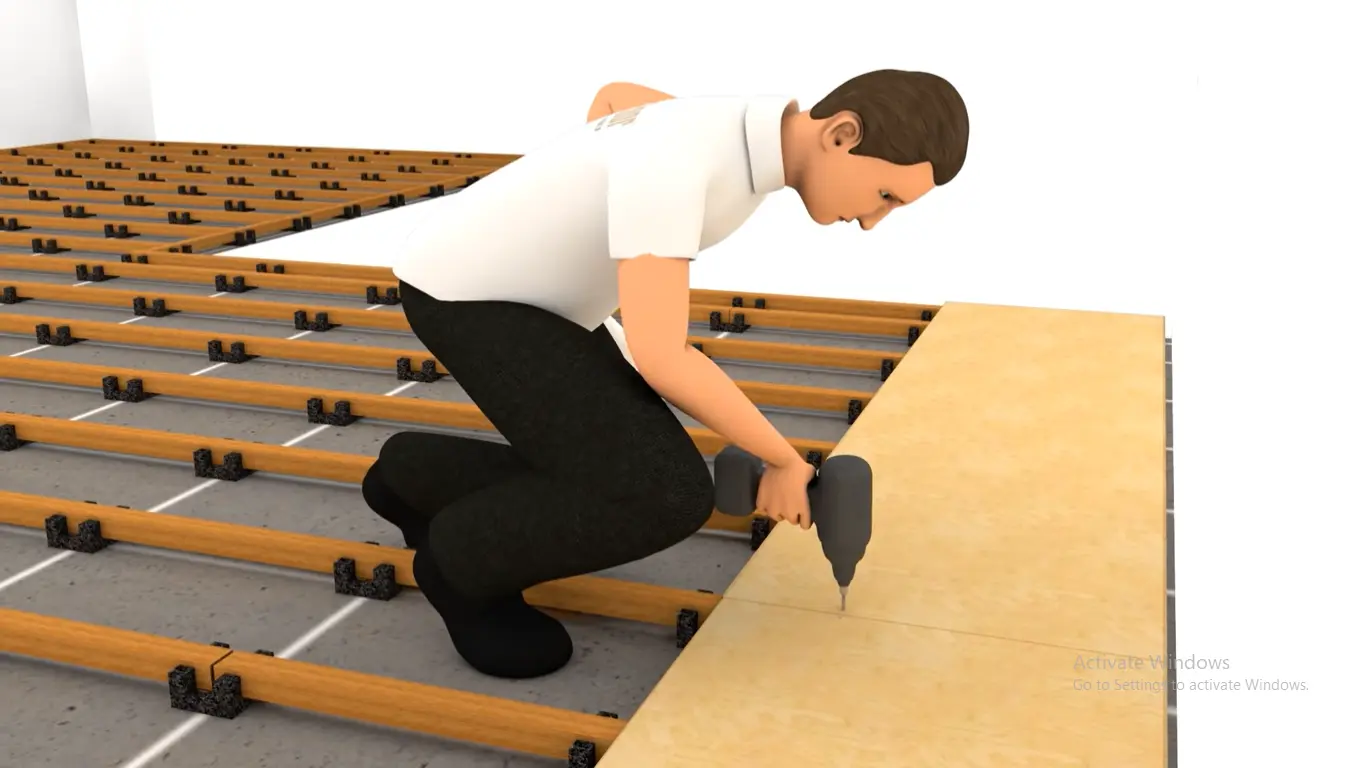
And just like that, you’re done! You have successfully installed the floating floor yourself and saved the cost of a labor. Also, you have soundproofed your wooden floor.
2: Lay acoustic underlayment
Acoustic underlayment is really good for floor soundproofing. I have used it in nearly all the rooms to keep things quiet. If you are dealing with echoing footsteps then trust me there is really no better way than this to stop it. It can also be used to soundproof concrete floor.
Acoustic underlayment are made of different materials but ones that are made up of rubber tends to be more effective than the rest.

Price-wise, It ranges from $0.2 to up to $3 per square foot depending on the type of material used and the thickness of the underlayment.
And it is super doable. You can absolutely handle it yourself. You just need to spread adhesive on the floor and then lay the underlayment over it. Boom, you’re done!
3: Cover your floor with evenly cut and uniform pieces of old tires
If you are looking for an effective way to make your hardwood floor super powerful at blocking out noise then this is a technique I recommend to you. I know you haven’t heard about this technique yet.
Well are made from rubber, and rubber is a really good sound absorber and can easily absorb and dampen any noise, whether it is impact or airborne form downstairs.
Now, doing this can be a bit tricky, especially if you’re not a DIY pro. But don’t worry, I’ve got your back. Here’s what you need to do:
- First of all, you need to collect old tires according to your floor size, wash them thoroughly and remove nails from them.
- Now, you need to cut the tires using reciprocating saws into flat, even pieces.
- Then, apply heavy-duty construction adhesive to the floor and also on the back of each tire strip.
- And stick the strips to the floor, leaving about 10 mm gaps on the sides.
- For more security of the tire strips, use 2-inch heavy duty and place it on the strip. Space the nails about 6 inches apart.
- Once the entire floor is covered, seal any gaps between the tire strips and on the sides with acoustic sealant.
- Once you finish sealing off gaps, cover the floor with an area rug or you can with flooring for a finished look.
And there you have it! Your hardwood floor is now a noise-blocking champion.
4: Use rubber mat with 6mm thick cork sheets
Are you looking for an affordable, effective and doable method to make your wooden floor soundproof? If so, then using a rubber mat with cork sheets is a solid choice.
In this technique you will need four materials:
- Rubber mat
- 6mm thick cork sheets
- Construction adhesive
- Acoustic sealant
You can buy these materials from HomeDepot. Rubber mat helps absorb and dampen sound and cork sheets do the same. While sealant helps seal the sides to prevent flanking sound.
This combination can provide you a noise reduction of up to 30 dB if done correctly. Follow these steps to complete it:
- First you need to ensure that yours is clean and even. It shouldn’t have any uneven surfaces and if you notice cracks or squeaks on the floor, fix it with the acoustic sealant.
- Now, spread the adhesive on the floor and roll the rubber mat over it and cut the extra pieces of the mat.
- Again, spread adhesive on the rubber mat. If your floor is big in size then spread in a small area that you are comfortable working with.
- After that, lay the 6mm thick cork sheets on top of the rubber mat, leaving about 10mm gaps along the edges.
- Repeat the steps 3 and 4 until you are done covering your entire floor.
- Then seal off those you deliberately leave in step 4.
- Finally, you can choose to either install your desired flooring on top of the cork or add another layer of a rubber mat for that extra oomph in soundproofing.
The cost of soundproofing your wooden floor with rubber mat and cork sheets can be around $2 to $5 per square foot. And the time investment? It might take a few hours, but hey, it’s a pretty doable DIY.
Soundproof a hardwood floor: FAQs
Q1. Why are my wood floors so noisy?
Ans: Wood floors make noise because they shrink in dry winter air and expand in humid summers, causing annoying squeaks. Rapid changes in temperature can also make any floor creak. Old homes tend to be noisier due to wear and tear. Loose boards or a shaky subfloor can contribute to the noise too.
Q2. How do you get rid of noise in wood floors?
Ans: To get rid of noise in wood floors, fix all the cracks and squeaky floor board and lay acoustic underlayment or install cork sheets over it to make it more soundproof.
Q3. Can I combine multiple soundproofing methods for better results?
Ans: Yes, you can combine multiple soundproofing methods for better results.
If you want to know how to make an attic floor soundproof then read the linked post.